Monday, October 24, 2011

The Elephant in the Living Room

I'm sure most of you have heard about the tragedy in Zanesville, OH last week, but for those of you who don't, here's the quick and dirty version.

Terry Thompson, the owner of an exotic animal preserve in Zanesville, opened the cage doors of his dozens of lions, tigers, bears and more and then committed suicide. Police were obviously called, as these animals are dangerous to people.  They ended up shooting and killing nearly 50 of the animals, including 18 tigers, 17 lions, 8 bears, a baboon.  Six animals were captured and sent to the Columbus Zoo (including two monkeys, three leopards, and a bear).  Read more about the story in the journal-news, here. 

See more pictures here (beware, link contains very sad and disturbing images)
It just so happens that I had been working with the Miami Middletown Office of Student Activities for the past few months on bringing in the filmmaker and star of a documentary called "The Elephant in the Living Room," a film all about the controversial issue of raising dangerous animals as household pets.  Timely, huh? 

Set against the backdrop of a heated national debate, director Michael Webber chronicles the extraordinary journey of two men at the heart of the issue – Tim Harrison, a police officer whose friend was killed by an exotic pet; and Terry Brumfield, a big-hearted man struggling to raise two African Lions.  The film has been praised by critics as one of the best of the year. 

We'll be showing the film next Tuesday, November 1, 2011 at 5 pm in the Harry T. Wilks Conference Center on the Miami Hamilton Campus.  Both Webber and Harrison will be available for questions and answers after the film. See the web events calendar for more details.

See a preview:


See http://www.theelephantinthelivingroom.comfor additional information about the film. Hope to see you there.

Wednesday, October 12, 2011

Cupcake Wars & Toilet Paper Art

Yesterday we tried a new event called "Cupcake Wars" in the Commons.  We had five or six students bake a bunch of cupcakes, and then we gave them out for free for students to decorate.  We also supplied the icing and other materials.  I am, as usual, blown away with how great the cupcakes turned out.  Students can be so creative!

I'm including a few pictures here to give you an idea of the kind of work that was done. Campus Activities Committee members will be voting on the "Best Overall" cupcake and awarding a bookstore gift card to the winner within in the next week.  Let us know which ones you think should win, too!


Now for the other half of this post's title:  Toilet Paper Art. We're hosting our second "Make and Take" event next week. 
 
I know whenever I tell people about making art out of toilet paper rolls, they kind of roll their eyes and say "greeeeat......." while silently thinking that it sounds terrible.  I agree, it doesn't sound quite as fun and exciting as cupcakes, but as you can see from our flyer above, you can really make some cool stuff, and basically for free!   

To demonstrate, I had my trusty student worker Emily create her own piece of art, while documenting the steps.  

Step One:  Gather supplies.  We've been collecting toilet paper and paper towel rolls for about 6 weeks now, in preparation for this event!  You'll also need scissors, a hot glue gun, and a canvas.  
  
Step Two:  Cut the roll into thin slices (you'll need to do this lots of times).  
 
Step Three: Use a hot glue gun to attach the strips, creating a flower look. 

 Step Four:  Paint the flowers, using whatever colors you want.  Emily painted a few of her flowers black and left a few unpainted as well.
 

Step Five:  Use the hot glue gun to attach your flowers to your canvas. 
 
Step Six:  At this point, you can bedazzle away.  Emily made vines of black glitter and attached jewels to the center.  Can you believe this was made out of toilet paper rolls?!?  

 
Be sure to join us for this event next week, or if you make one on your own, e-mail it to us so we can post your masterpiece!


Monday, October 3, 2011

365 Club: One Month Update

In case you missed this post, there are a bunch of folks here at Miami Hamilton who have all agreed to trying running at least one mile every single day for a year.  We started this project on September 1 and I thought I'd give you all a bit of a one month check-in so you can see how things are progressing. 

The first thing to note is that we have doubled the number of participants from 11 to 22... Although that number has shrunk with people who have dropped out.  Here's the list I have now:

My own experience has been pretty good.  I was experiencing some ankle pain during the first week or so, but I got new running shoes and the pain is almost completely gone.  I was also sick for a couple days in early September but I sucked it up and ran anyway.  The most miles I ran in one day was 5.50 (pretty early on), and I ran the absolute minimum of 1 on several days as well. Here's my official report from Garmin Connect (I have a fancy GPS watch that sends all of my running data to my account online):


The number I like best is at the bottom - I've burned 5,295 calories!  But it took me 8 hours.  Phew.  Makes me tired to think about it.

What I like most about running a mile a day is knowing that I'm at least doing something to be healthier every day.  What I don't like about it (besides that it's annoying sometimes to squeeze it in) is that I sometimes settle for only doing a mile when I know I could do more. But I've made it a goal to run at least three miles at least once a week this month. 

As for the rest of the 365 Club, I sent out an e-mail last week to gauge progress and it's as I expected - some folks have dropped it completely, some are going strong, and some have "modified" the rules to work for them.
 
I've heard back from 9 of 22 people who are still going strong, not missing any days except for the allotted sick days.  Those people include:  myself, Teresa, James G., Sue, Chris, Bob, Mark, Daniel and Suzanne.  Stephanie has modified the rules slightly to fit her lifestyle (the girl does two-hour spin classes at the YMCA .... running on top of that is crazy!).  I have heard officially of two people dropping it completely and I am assuming that another couple of folks have dropped as well. 

Overall, I think we're on the right track.  The people who have stuck with it have said that the miles are getting easier and easier.   We're planning a 50 day celebration in a few weeks.  I'll be back with another update at the end of October.  For now, we are:  one month down, eleven to go!  Wish us luck!


Wednesday, September 28, 2011

Save Monies and Paint a Pot

Next week in Schwarm, we're hosting a "Paint-a-Pot" event.  Because nobody could possibly understand what I mean by that, I will explain further...

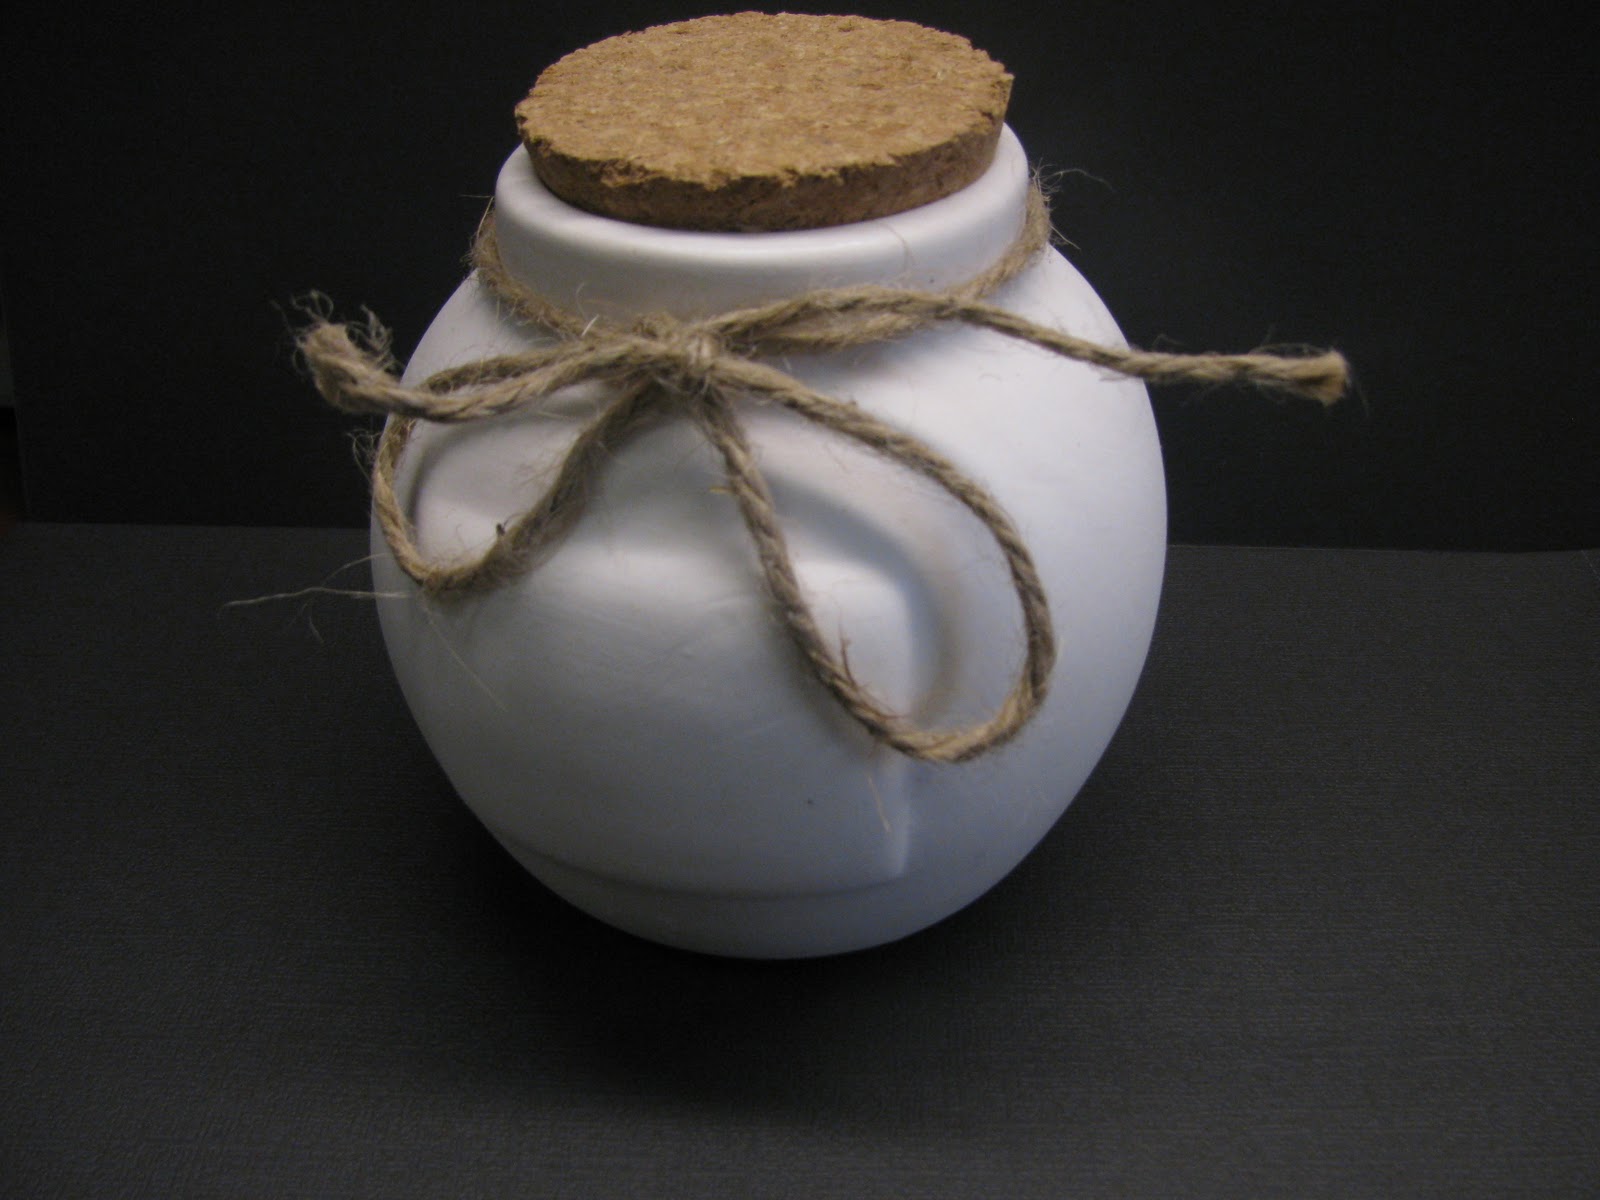
Here is what we mean by "pot":

Yes, I did a photo shoot with the pot.

They are basically white clay pots with cork in them... the idea is that you decide on something you want to save up for (like a trip or a new computer, etc.) and dedicate this "pot" for that purpose.  You see these things all over Hallmark stores, but this is your opportunity to make your very own.   We ordered several dozen of the pots from Oriental Trading, and we have lots of paint and other supplies that you can use to make your pot.  

I wanted to give you all an example of what a completed pot would look like before the event next week, so I put my student worker, Emily on the task.  Here's Emily:
She is quite crafty, so I knew she would be up to the task.  First, she gathered her paint supplies.  Acrylic Paint from any craft store works perfectly.

Then... wait for it.... she painted:
 After waiting a few minutes for the pink paint to dry (doesn't take long at all), she painted polka dots:
 Then got out the office bedazzling jewels:
 And super glued those suckers on.  Hot glue would probably also work.  She switched out the twine for some pretty white ribbon and wrote "Pennies... for Pinterest," a nod to our very favorite website these days and a fantastic place to go for inspiration, projects, fashion, recipes, and more.   Here's the link: Link to Pinterest
It's officially adorable.   So if you are around next week, we'll be doing this activity (for free, including the pot and all of the supplies) in Schwarm Commons on Tuesday, October 4, 2011 from 11:30 am to 2:30 pm.  Join us!


Wednesday, September 21, 2011

How to Make Your Own Dry Erase Board

The Campus Activities Committee has committed this year to providing at least one event per month in which people can bring in something that they no longer want and re-purpose it creatively into something useful.  It's our way of educating and promoting a more environmentally-friendly attitude. 

I alluded to this concept  in last week's post, but I wanted to elaborate and share some of our ideas for upcoming repurposing events.

We're kind of going with a "Make & Take" theme, cause it's catchy and we like to be cute.  Our first event revolved around taking old picture frames and turning them into Dry Erase Boards.  Here's how it works:

1.  Take an old photo frame and remove the picture / artwork inside.
 2.  Pick out a festive colored scrapbook paper and cut it down to size. In this case, I used 12x12 scrapbook paper and cut it down to 8x10 inches.
3.  Place the scrapbook paper in the frame and close it back up.  If you are making a menu-planning board, here is where you add stickers or letters for each day, Monday through Friday or Monday through Sunday. 
4.  I decided to leave my board unpainted, but this is the point that you can paint your frame (just use any acrylic paint and a foam brush).

5.  Embellish your frame however you want it.  I used felt flowers.  Then grab a dry erase marker and you're done!

Bonus hint:  We purchased some frames from Goodwill to repurpose for this event and found that Goodwill is in the habit of marking "99 cents" in PERMANENT Marker on the glass of the frame.

Good news is, it's super easy to get permanent marker off of glass or dry-erase board.  Just write over the permanent marker with dry-erase marker.  It'll wipe right off.  I don't know how it works.  Magic, probably.

Here are some other examples of fabulous Dry-Erase Boards:


There you have it.  Virtually a free way to create something you need out of a few things you don't want!


Tuesday, September 13, 2011

Finished Products

We have been quite busy in the Office of Student Activities in the past week!  I realized today that it's the first non-Friday since classes started (we're on week four, p.s.) that we haven't had an event. That explains why I have so many e-mails piling up....

But before getting to the e-mails, I wanted to share some of the awesome finished products from our recent events.  We recently hosted Pottery Painting and a September 11 quilt project, and I think students came up with some pretty awesome stuff. 

Here are some of the pottery tiles that students created:

And some of the bowls:

And some of the mugs:


Me, modeling the mustache mug
Student Government Association, Campus Activities Committee and the Office of Student Activities teamed up last week to host quilt square making for the remembrance of the 10th anniversary of September 11.  Then, they put together a really amazing quilt and hung it up in Schwarm Commons this week.  The quilt squares themselves represent the two towers and the blue fabric in the middle (with 5 sides) represents the pentagon.  I think the students did an outstanding job of creating this piece. 


Tomorrow, we're hosting our first "Make and Take" event, during which we'll repurpose an old item that we no longer use into something that we need and can use now.  This month, we're taking old picture frames and repurposing them into Dry-Erase Boards and Menu Planning Boards.  Here's a preview of some of the samples we have already created:


 A menu-planning board:

If you want one of your own, stop by Schwarm Commons tomorrow (Wednesday, 9/14/11), with an old picture frame, and make it!  We'll be there at 11:30 am until things fizzle out (probably 1:30 pm).